GUI 系统
Taichi 有一个内置的 GUI 系统,用于对 Taichi fields 或 NumPy ndarray 等数据容器内的数据行进视觉模拟 Taichi GUI 同时对基本几何体的绘制提供了简单的支持。
创建并显示窗口
以下代码创建了一个 640x360 窗口,其标题为“Hello World!”,并通过调用 gui.show() 来显示它:
gui = ti.GUI('Hello World!', (640, 360))
while gui.running:
    gui.show()
note
请在 while 循环内调用 gui.show()。 否则,这个窗口将闪烁一次后消失。
关闭窗口
您可以在 while 循环内通过设置 gui.running=False 关闭GUI:
gui = ti.GUI('Window Title', (640, 360))
while gui.running:
    if some_events_happend:
        gui.running = False
    gui.show()
坐标系统
每个窗口都建立在坐标系统上:坐标原点位于左下角, +x 方向向右延伸, +y 方向向上延伸。
显示一个 field 或 ndarray
请调用 gui.set_image() 显示Taichi field 或 NumPy ndarray。 该方法接受这两种类型作为输入。
image = ti.Vector.field(3, ti.f32, shape=(640, 480))
while gui.running:
    gui.set_image(image)
    gui.show()
因为Taichi field 是一个 全局的 数据容器, 如果向量 field image 在while 循环之间被更新过,GUI 窗口将会刷新以显示最新图像。
IMPORTANT
请确保输入的形状与GUI 窗口的分辨率相匹配。
Zero-copying frame buffer
在 gui.et_image() 方法调用的每个循环内, GUI 系统都会将图像数据转换为可显示的格式,并将结果复制到窗口缓冲区。 当窗口大小较大时,这会造成巨大的超负荷,使得很难实现高 FPS (每秒帧率)。
如果您只需要调用 set_image() 方法而不使用任何绘图命令, 您可以启用 fast_gui 模式以提高性能。 这种模式允许 Taichi GUI 直接将图像数据写入帧缓冲器而不需要额外复制,大幅增加了 FPS。
gui = ti.GUI(res, title, fast_gui=True)
要使这种模式能够正常运行,请确保传入 gui.set_image() 的数据格式与显示器兼容。 换言之,如果它是Taichi field,请确保它是以下之一:
- a vector field
ti.field(3, dtype, shape)compatible with RGB format. - 向量 field
ti.field(4, dtype, shape),兼容 RGBA 格式。
注意 dtype 必须是 ti.f32, ti.f64, 或 ti.u8 的其中之一。
在窗口上绘画
Taichi 的 GUI 系统支持绘制简单的几何形状,如线、三角形、长方形、圆圈和文字等。
每个绘图方法的 pos 参数都接受 Taichi field 或 NumPy 数组。 不是 Python 原始数据类型。 field 或数组的每个元素都是一对浮点数,从 0.0 到 1.0代表几何形状的相对位置。 例如:
(0.0, 0.0): 窗口左下角。(1.0, 1.0): 窗口右上角。
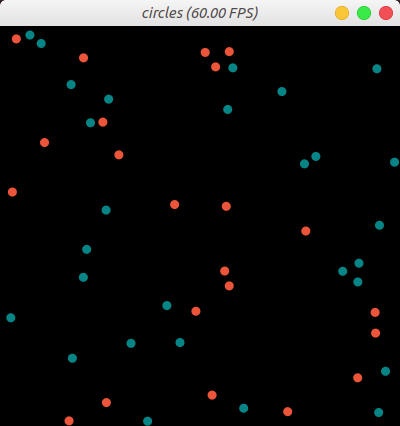
下面的代码绘制了 50 个半径为 5 的圆圈,共有三种不同的颜色由 一个大小与 pos 相同的整数数组 indices 随机分配, 。
import numpy as np
pos = np.random.random((50, 2))
# Create an array of 50 integer elements whose values are randomly 0, 1, 2
# 0 corresponds to 0x068587
# 1 corresponds to 0xED553B
# 2 corresponds to 0xEEEEF0
indices = np.random.randint(0, 2, size=(50,))
gui = ti.GUI("circles", res=(400, 400))
while gui.running:
    gui.circles(pos, radius=5, palette=[0x068587, 0xED553B, 0xEEEEF0], palette_indices=indices)
    gui.show()
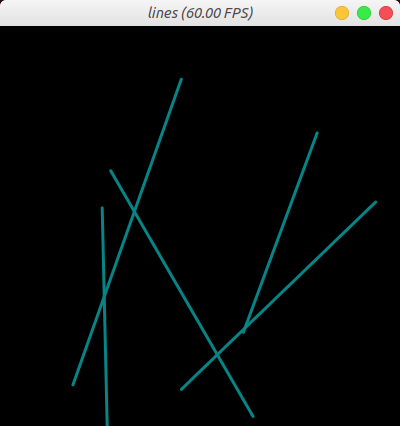
下面的代码绘制五个蓝色线段,其宽度为2, 其中的 x 和 y 分别代表五个线段的起点和终点。
import numpy as np
X = np.random.random((5, 2))
Y = np.random.random((5, 2))
gui = ti.GUI("lines", res=(400, 400))
while gui.running:
    gui.lines(begin=X, end=Y, radius=2, color=0x068587)
    gui.show()
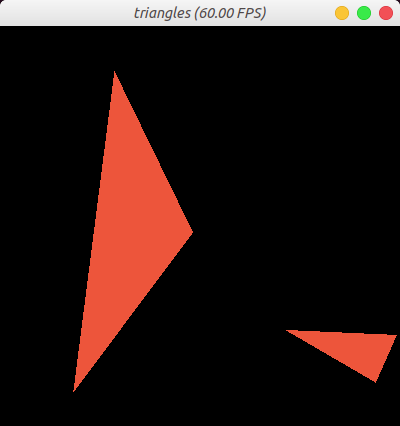
以下代码绘制了两个橙色三角形橙色,其中 x, y, 和 z 分别代表这三个三角形的三个顶点。
import numpy as np
X = np.random.random((2, 2))
Y = np.random.random((2, 2))
Z = np.random.random((2, 2))
gui = ti.GUI("triangles", res=(400, 400))
while gui.running:
    gui.triangles(a=X, b=Y, c=Z, color=0xED553B)
    gui.show()
事件处理
Taichi的图形界面系统也提供了一套方法用于鼠标和键盘的控制。 输入事件分为三类:
ti.GUI.RELEASE  # key up or mouse button up
ti.GUI.PRESS    # key down or mouse button down
ti.GUI.MOTION   # mouse motion or mouse wheel
事件键指的是您从键盘或鼠标中按下的键。 可以是以下其中之一
# for ti.GUI.PRESS and ti.GUI.RELEASE event:
ti.GUI.ESCAPE  # Esc
ti.GUI.SHIFT   # Shift
ti.GUI.LEFT    # Left Arrow
'a'            # we use lowercase for alphabet
'b'
...
ti.GUI.LMB     # Left Mouse Button
ti.GUI.RMB     # Right Mouse Button

# for ti.GUI.MOTION event:
ti.GUI.MOVE    # Mouse Moved
ti.GUI.WHEEL   # Mouse Wheel Scrolling
事件过滤器 可以是 key、 type 或 (type, key) 元组。 例如:
# if ESC pressed or released:
gui.get_event(ti.GUI.ESCAPE)

# if any key is pressed:
gui.get_event(ti.GUI.PRESS)

# if ESC is pressed or SPACE is released:
gui.get_event((ti.GUI.PRESS, ti.GUI.ESCAPE), (ti.GUI.RELEASE, ti.GUI.SPACE))
gui.get_event() 将一个事件从队列中抛出并保存到 gui.event。 例如:
if gui.get_event():
    print('Got event, key =', gui.event.key)
下面的代码定义了 当 循环持续到 ESC 键被按下
gui = ti.GUI('Title', (640, 480))
while not gui.get_event(ti.GUI.ESCAPE):
    gui.set_image(img)
    gui.show()
gui.is_pressed() 检测到按键。 如下代码片段所示,您必须将它与 gui.get_event() 一起调用。 否则,按键将不会被更新。
例如:
while True:
    gui.get_event()  # must be called before is_pressed
    if gui.is_pressed('a', ti.GUI.LEFT):
        print('Go left!')
    elif gui.is_pressed('d', ti.GUI.RIGHT):
        print('Go right!')
warning
Call gui.get_event() before calling gui.is_pressed(). Otherwise, gui.is_pressed() does not take effect.
获取光标位置
gui.get_cursor_pos() 返回光标在当前窗口的位置。 返回值是范围内 [0.0, 1.0] 的一对浮点数。 例如:
mouse_x, mouse_y = gui.get_cursor_pos()
GUI 窗口部件
Taichi 的 GUI 系统也提供了包括 slider(), label(), 和 buton() 在内的窗口部件, 方便您自定义您的控制界面。 请看以下代码片段:
import taichi as ti
gui = ti.GUI('GUI widgets')

radius = gui.slider('Radius', 1, 50, step=1)
xcoor = gui.label('X-coordinate')
okay = gui.button('OK')

xcoor.value = 0.5
radius.value = 10

while gui.running:
    for e in gui.get_events(gui.PRESS):
        if e.key == gui.ESCAPE:
            gui.running = False
        elif e.key == 'a':
            xcoor.value -= 0.05
        elif e.key == 'd':
            xcoor.value += 0.05
        elif e.key == 's':
            radius.value -= 1
        elif e.key == 'w':
            radius.value += 1
        elif e.key == okay:
            print('OK clicked')

    gui.circle((xcoor.value, 0.5), radius=radius.value)
    gui.show()