
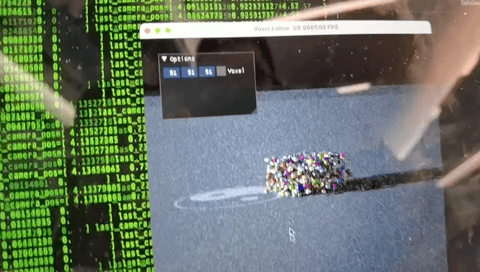
On a Sunday afternoon about a couple of months ago, when Ye and I were on our way back from a long week of travel, we decided to do something to relax on the train ( to kill time). Since we happened to mention Minecraft and MagicaVoxel, we decided to do a Hackathon, where we use Taichi Lang to create a GPU path tracing voxel renderer. Soon, before we were back home, we had our prototype:
Taichi Lang is embedded in Python and it runs on any operating system and can easily interact with Python. As far as I know, apart from Taichi Lang, there's no such tooling in the Python ecosystem for generating GPU path tracing voxel renders. With Taichi Lang, one can easily create such a renderer (https://github.com/taichi-dev/voxel-challenge/blob/main/renderer.py) in around 300 lines of code.
When finishing off the program, we became aware of something more serious: It is much easier for an experienced graphics developer to code a path tracing renderer than to come up with a scene setting for a beautiful image. Considering the huge amount of work involved in developing the UI, if we could only edit voxels one by one, it would take ages to get the intended results!
I'm not a mighty Minecraft developer, but, thankfully, I can program to batch process the voxels. Let's get started!
2. The theme
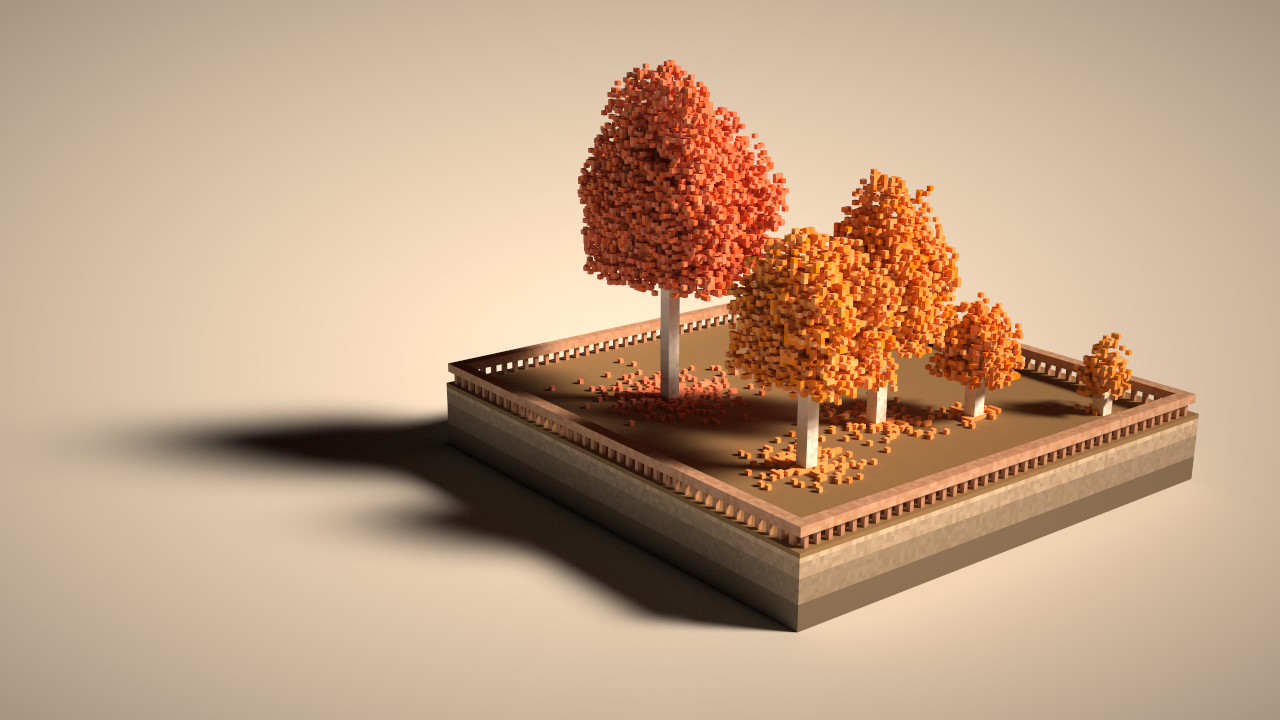
Finding a beautiful theme is half success. Forest is a common theme in many great voxel artworks. Then I found from online the following picture: a quiet forest in the autumn air. Nice!

It must be very interesting to reproduce a tranquil autumn theme with voxels and use ray tracing to render it!
Note: So long as you have basic Python programming knowledge, you will be able to follow the rest of this post. Taichi Lang is a parallel programming language embedded in Python, allowing your program to be accelerated by your GPU. If you are unfamiliar with Taichi Lang, read this: https://docs.taichi-lang.org/docs/.
3. Program in Python and indulge in the 3D voxel world
When finishing reading this post, you will be able to create your own 3D voxel world. The source code is in Python and compatible with almost all platforms. It runs fine on my Macbook (20 FPS) except for some noises, and the noises subside quickly after you pause. If you are using an ultimate GPU like RTX 3090, it will definitely run much more smoothly.
If you wish to try out the autumn theme for yourself and view the complete source code (91 lines of Python code in total), you can clone my repo at https://github.com/yuanming-hu/voxel-art. If you wish to create your own voxel world, start by using our template repo https://github.com/taichi-dev/voxel-challenge/
Just so you know, Taichi Voxel Challenge 2022 is getting heated. If you are also a voxel art lover, you are very welcome to join! Let's compare 'voxels' and motivate each other! For more information about how to participate, see the Voxel Challenge README at https://github.com/taichi-dev/community/blob/main/events/voxel-challenge/README.md
It has been reported at https://github.com/taichi-dev/taichi/issues/4891 that Taichi Lang v1.0.1 has some compatibility issues with the Vulkan backend in some environments. The next Taichi Lang release will ship the fix. As a workaround, use Taichi Lang v1.0.0 instead:
pip install taichi==1.0.0
4. Using voxels to create a forest in the autumn air
The autumn theme has three key elements: trees, forest floor covered by fallen leaves, and volumetric fog. Our renderer does not support volumetric fog, but we can simulate autumn sunset with a 45° directional light source (set_directional_light()) and a yellowish light color (set_background_color()) instead.
from scene import Scene
import taichi as ti
from taichi.math import *
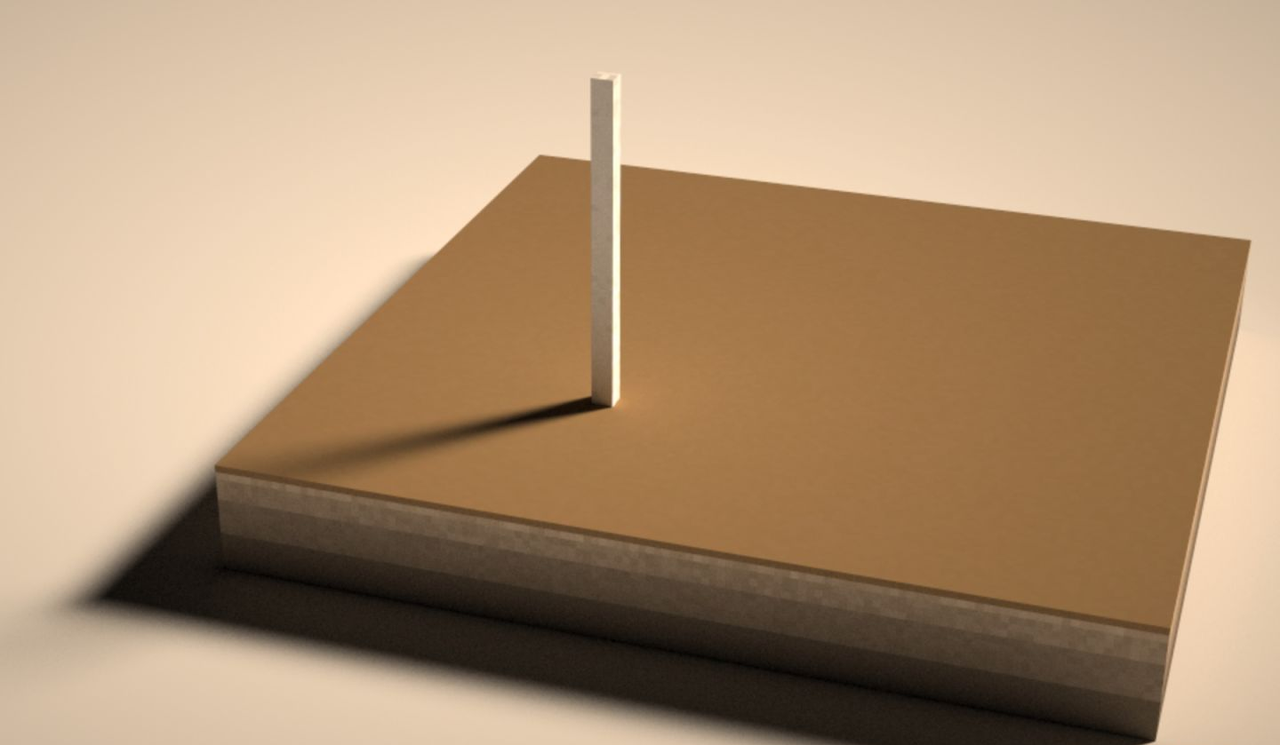
scene = Scene(voxel_edges=0, exposure=2) # Create a scene, specifying the voxel edge and exposure.
scene.set_floor(0, (1.0, 1.0, 1.0)) # Height of the floor
scene.set_background_color((0.5, 0.5, 0.4)) # Color of the sky
scene.set_directional_light((1, 1, -1), 0.2, (1, 0.8, 0.6)) # Direction and color of the light
@ti.kernel
def initialize_voxels():
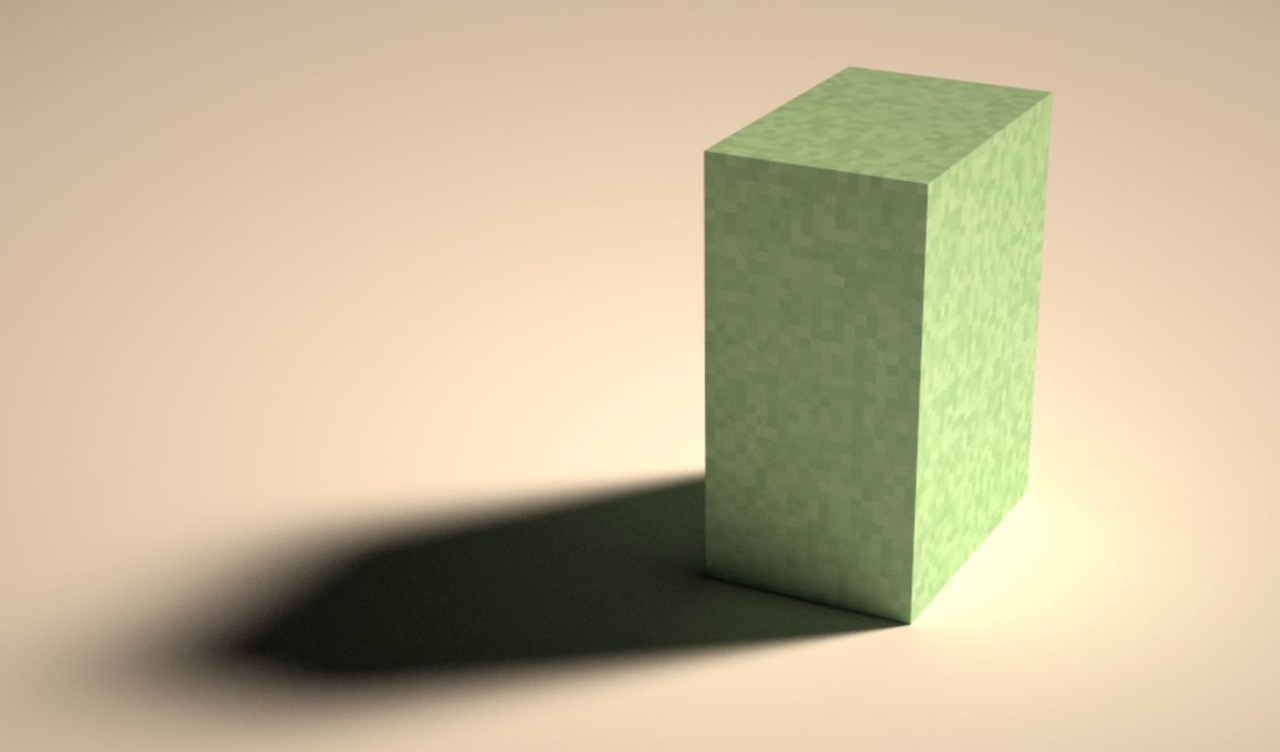
scene.set_voxel(vec3(0), 1, vec3(1)) # Add a (1, 1, 1) voxel at the position of (0, 0, 0)
initialize_voxels()
scene.finish()
Then you get the following scene:

This is a small cube. I tuned the direction and color of the light to add a touch of the autumn air.
You may have noticed the black edges. Why we still have edges even if we have set voxel_edge to zero? This is due to the float-point precision. Well, they will not be noticed if you don't look close at them...
4.1 Base floor
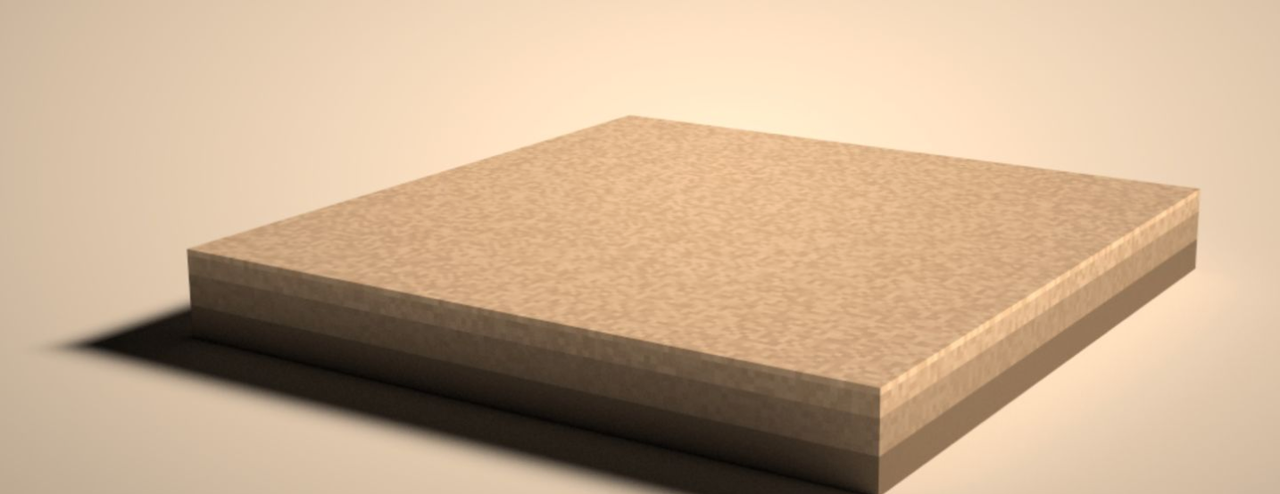
Sectional drawing is the technique commonly used in many masterpiece voxel artworks. In other words, a cross section can help reveal things that cannot been seen otherwise. In our case, it is the base floor (earth of multiple layers):

We can imitate the above cake to make a base floor of earth.
Now we start building the base floor layer by layer, and each layer is virtually a flat block. And we need a function for defining a flat block, which stretches from the point (pos[0], pos[1], pos[2]) and has a size of size[0] x size[1] x size[2]. We also need to add some noise (color_noise) to its color to make it look more real.
@ti.func
def create_block(pos, size, color, color_noise):
    for I in ti.grouped(
        ti.ndrange((pos[0], pos[0] + size[0]),
                   (pos[1], pos[1] + size[1]),
                   (pos[2], pos[2] + size[2]))):
        scene.set_voxel(I, 1, color + color_noise * ti.random())
The key here is the use of ti.ndrange. It can iterate over multiple ranges in one for loop.
Using ti.grouped, we pack the three loop variables i, j, and k into a vector I = (i, j, k). Using the create_block() method, we can draw a large block:
@ti.kernel
def initialize_voxels():
    create_block(pos=ivec3(0, 0, 0),
                 size=ivec3(20, 40, 30),
                 color=vec3(0.3, 0.5, 0.3),
                 color_noise=vec3(0.1))
There we go:
Then we can loop the create_block()method call for four times to draw a four-layered base floor:
@ti.kernel
def initialize_voxels():
    for i in range(4):
        create_block(ivec3(-60, -(i + 1)**2 - 40, -60),
                     ivec3(120, 2 * i + 1, 120),
                     vec3(0.5 - i * 0.1) * vec3(1.0, 0.8, 0.6),
                     vec3(0.05 * (3 - i)))
The color is a bit lighter for the ground. Hmm, let's add a darker surface to it.
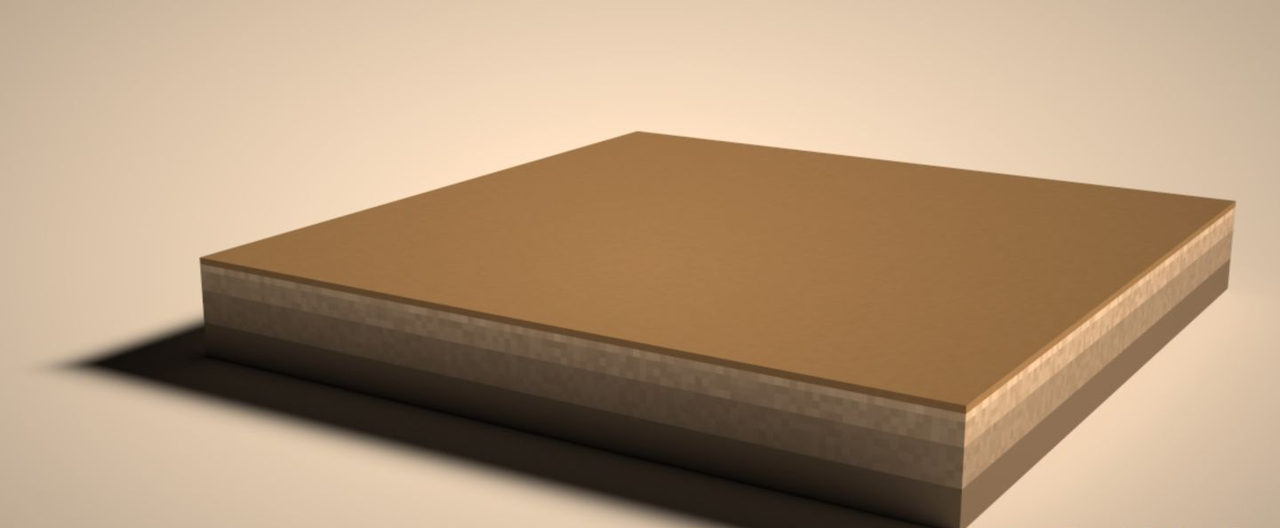
Not too bad. By mimicking the layered cake, we have a base floor for holding the trees, fallen leaves, and fences.
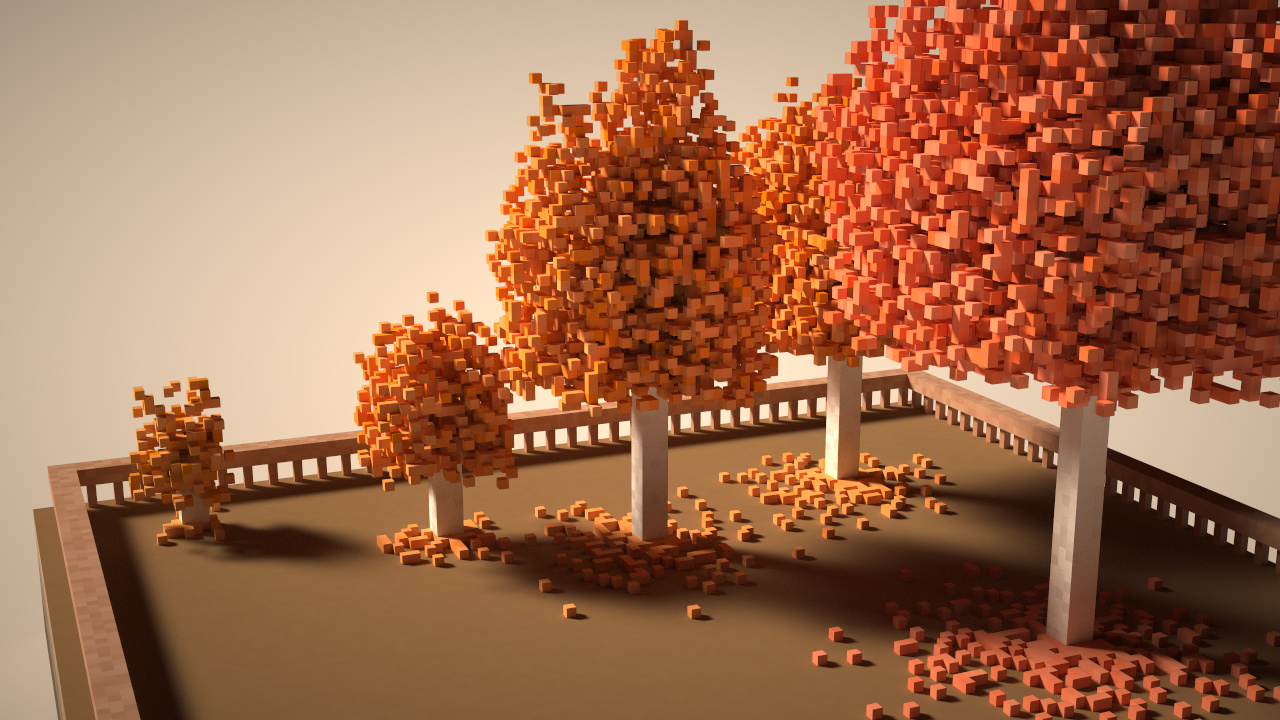
4.2 Tree and fallen leaves
After finishing reading this session you will know how to create a forest.

One tree does not make a forest, and we have to make it within 99 lines of code. So, first off, we need a function for creating a tree:
@ti.func
def create_tree(pos, height, radius, color):
    ...
The function takes four parameters:
- pos: Position of the tree.
- height: Height of the tree.
- radius: Radius of the tree crown
- color: Color of the leaves.
Let's start with something easy, the tree trunk, and we can save some time by recycling the create_block() function:
    @ti.func
    def create_tree(pos, height, radius, color):
        create_block(pos, ivec3(3, height - radius * 0.5, 3), vec3(0.7), vec3(0.3))
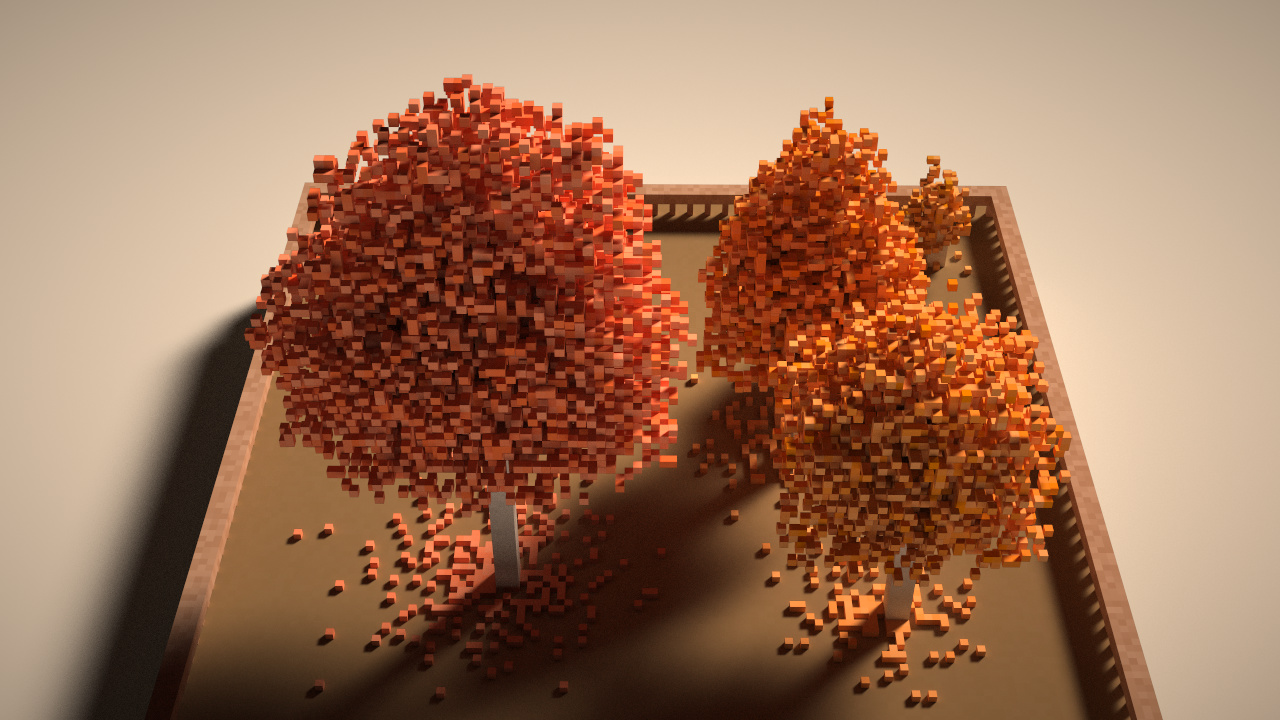
Now, let's add some leaves to the bold, boring tree trunk. Here, we define a function called create_leaves(). In this function, we make the following three assumptions:
- The leaves of the tree are in the shape of a cylinder.
- Each leaf has a probability of occurrence in the cylinder.
- A leaf's probability of occurrence is inversely proportional to its distance to the axis of the cylinder.
    @ti.func
    def create_leaves(pos, radius, color):
        for I in ti.grouped(
                ti.ndrange((-radius, radius), (-radius, radius),
                           (-radius, +radius))):
            f = I / radius
            d = vec2(f[0], f[2]).norm() # Distance to the axis of the cylinder (tree crown)
            prob = max(0, 1 - d)**2
            if ti.random() < prob:
                scene.set_voxel(pos + I, 1, color + (ti.random() - 0.5) * 0.2)
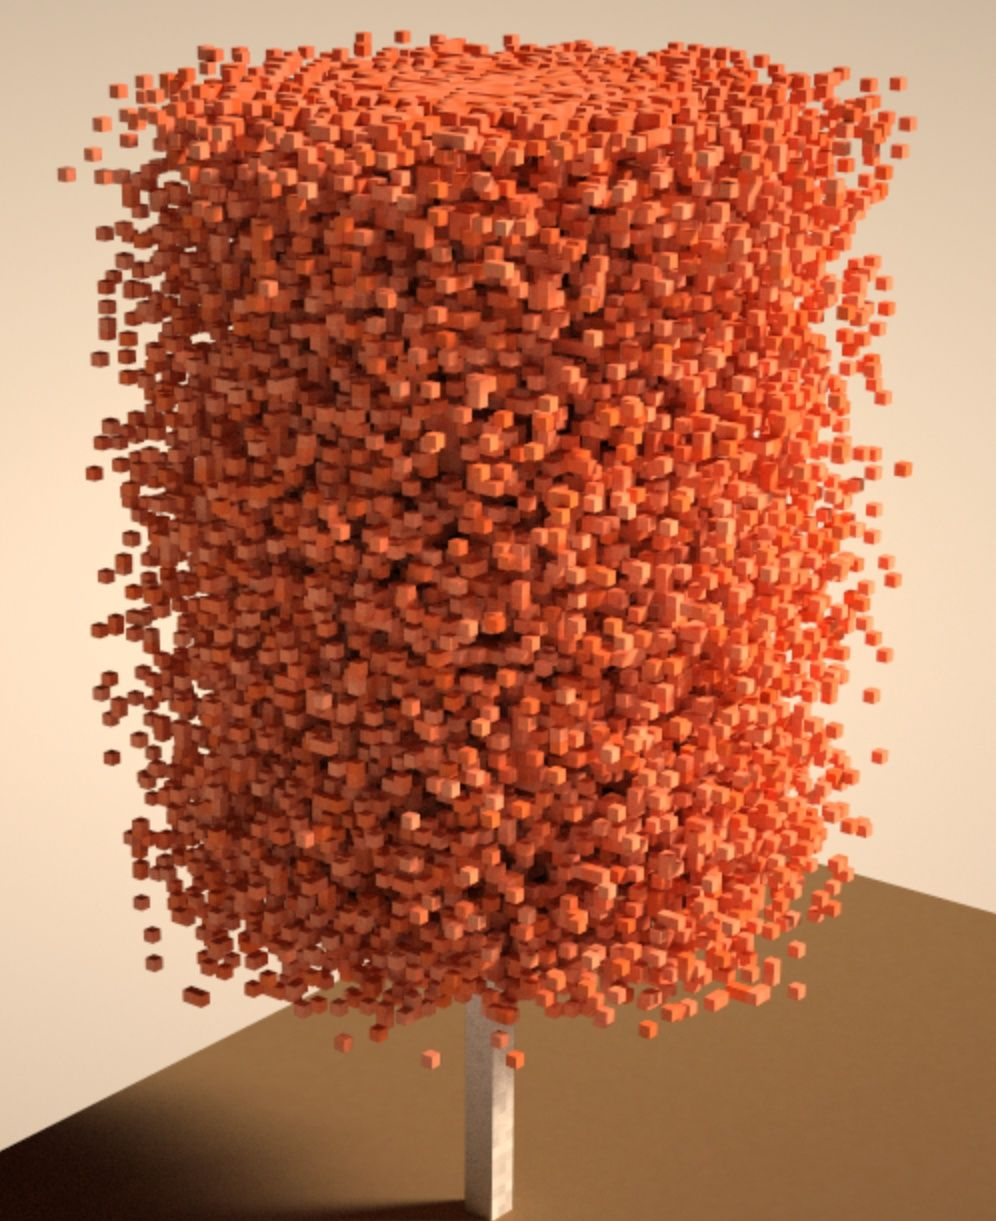
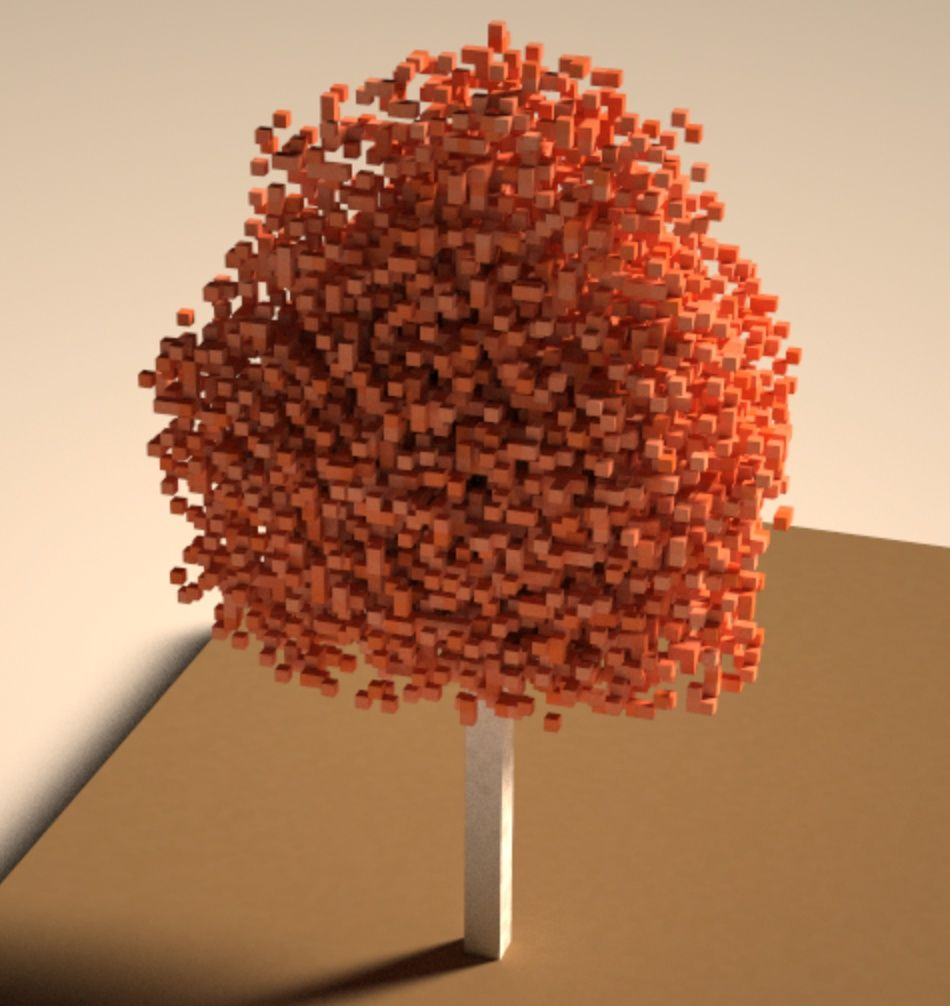
Well, it doesn't look very real, but we can use mathematics and noise to give it some fine tweak:
    @ti.func
    def create_leaves(pos, radius, color):
        for I in ti.grouped(
                ti.ndrange((-radius, radius), (-radius, radius),
                           (-radius, +radius))):
            f = I / radius
            h = 0.5 - max(f[1], -0.5) * 0.5
            d = vec2(f[0], f[2]).norm()
            prob = max(0, 1 - d)**2 * h  # xz mask
            prob *= h  # y mask
            # noise
            prob += ti.sin(f[0] * 5 + pos[0]) * 0.02
            prob += ti.sin(f[1] * 9 + pos[1]) * 0.01
            prob += ti.sin(f[2] * 10 + pos[2]) * 0.03
            if prob < 0.1:
                prob = 0.0
            if ti.random() < prob:
                scene.set_voxel(pos + I, 1, color + (ti.random() - 0.5) * 0.2)
Though the function looks a bit complicated, the key point is to calculate a probability for each voxel in the ‘leaves' region. After adding some details like noise, we are almost done with the tree.
Autumn has always been synonymous with fallen leaves. Then, we intersperse the circular ground under the tree with some random voxels:
        for i, j in ti.ndrange((-radius, radius), (-radius, radius)):
            prob = max((radius - vec2(i, j).norm()) / radius, 0)
            prob = prob * prob
            if ti.random() < prob * prob:
                scene.set_voxel(pos + ivec3(i, 1, j), 1,
                                color + ti.random() * vec3(0.1))
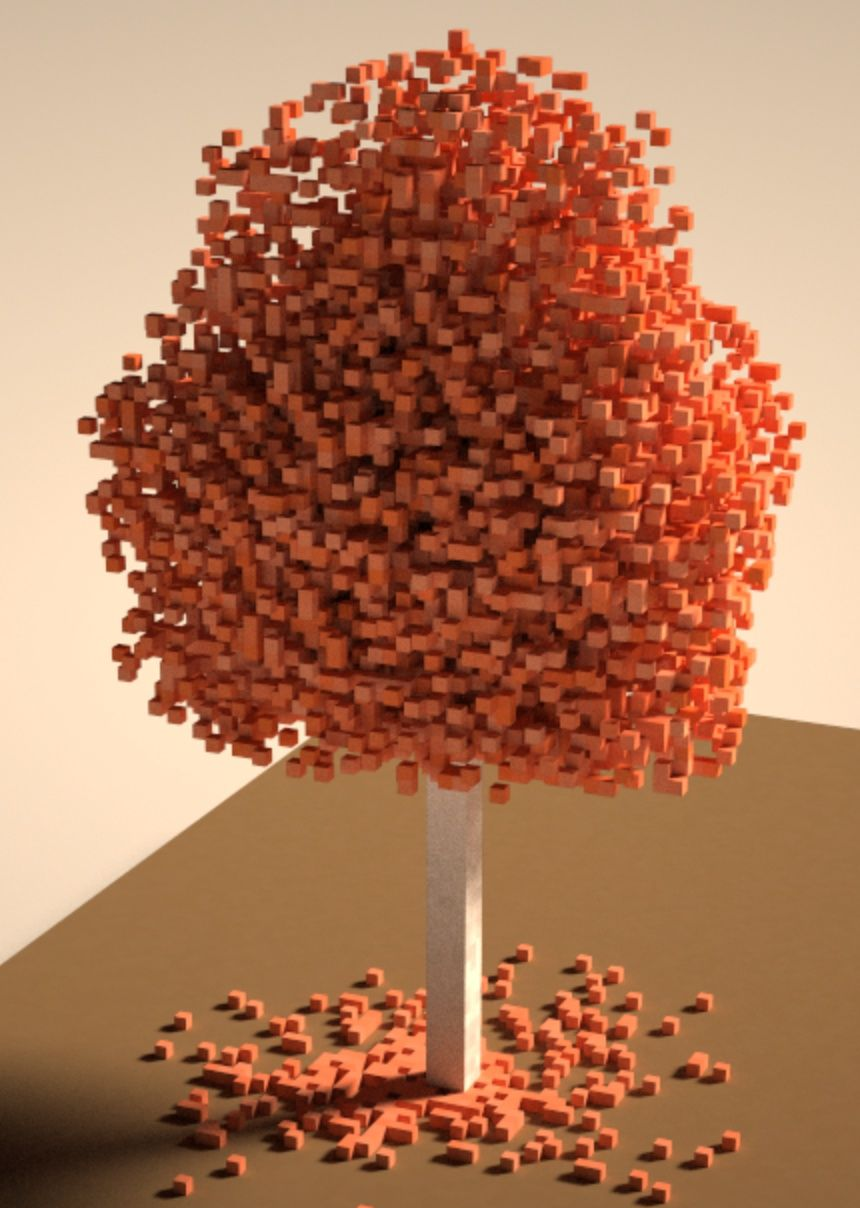
After calling the create_tree()method a few times, we get a small forest. You probably need to fine-tweak the position, height, and color of each tree:
        create_tree(ivec3(-20, -40, 25), 65, 35, vec3(1.0, 0.3, 0.15))
        create_tree(ivec3(45, -40, -45), 15, 10, vec3(0.8, 0.4, 0.1))
        create_tree(ivec3(20, -40, 0), 45, 25, vec3(1.0, 0.4, 0.1))
        create_tree(ivec3(30, -40, -20), 25, 15, vec3(1.0, 0.4, 0.1))
        create_tree(ivec3(30, -40, 30), 45, 25, vec3(1.0, 0.4, 0.1))
4.3 Fences
The last step is to create fences, which is to add a bar along each direction and insert small supporting sticks at regular intervals:
@ti.func
def make_fence(start, direction, length):
    color = vec3(0.5, 0.3, 0.2)
    create_block(start, direction * length + ivec3(3, 2, 3), color, vec3(0.1))

    fence_dist = 3
    for i in range(length // fence_dist + 1):
        create_block(start + direction * i * fence_dist + ivec3(1, -3, 1), ivec3(1, 5, 1), color, vec3(0))
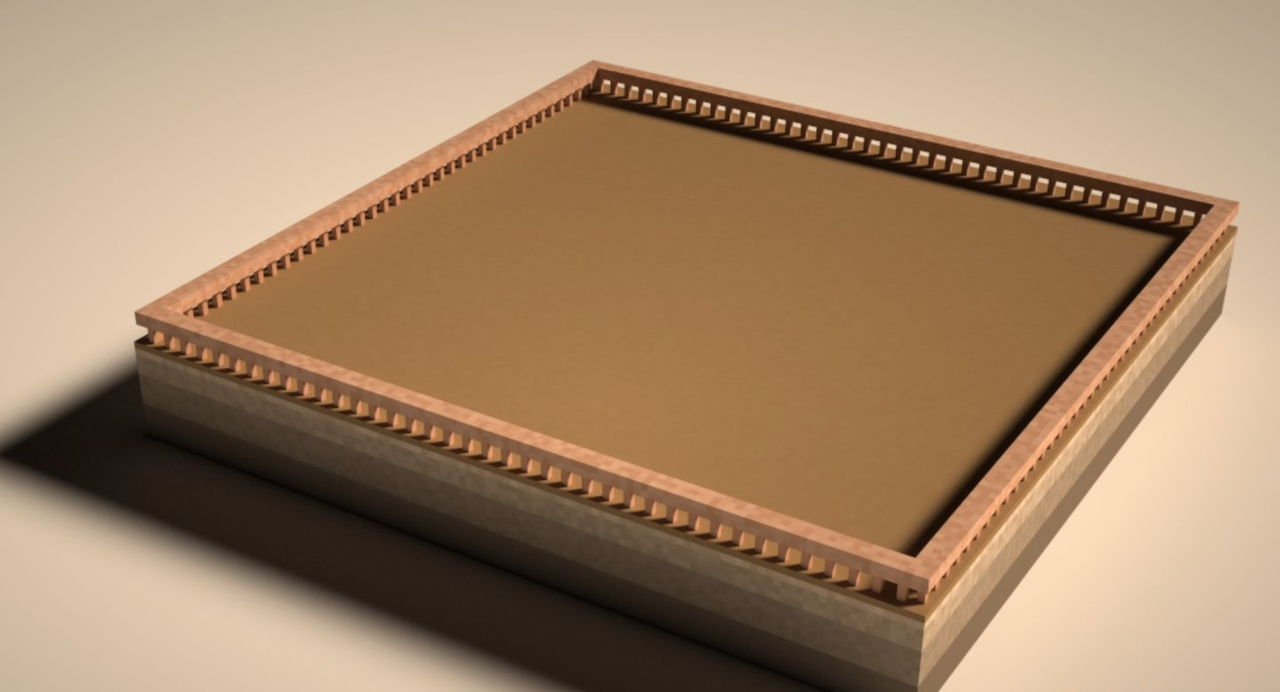
Now we are done with the base floor, trees, fallen leaves, and the fences. Let's call it a day!
Press W/S/A/D/Q/E to enable panoramic mode and press P for screen capture. Alas! Haven't touched my camera for a long while, but at least I can turn to the 3D voxel world for solace. :-)
5. Some great entries of Voxel Challenge 2022
Before we move on to the next section, I'd like to share with you some of the very interesting entries of Voxel Challenge 2022, all made within 99 lines of Python code. Do bear with me.

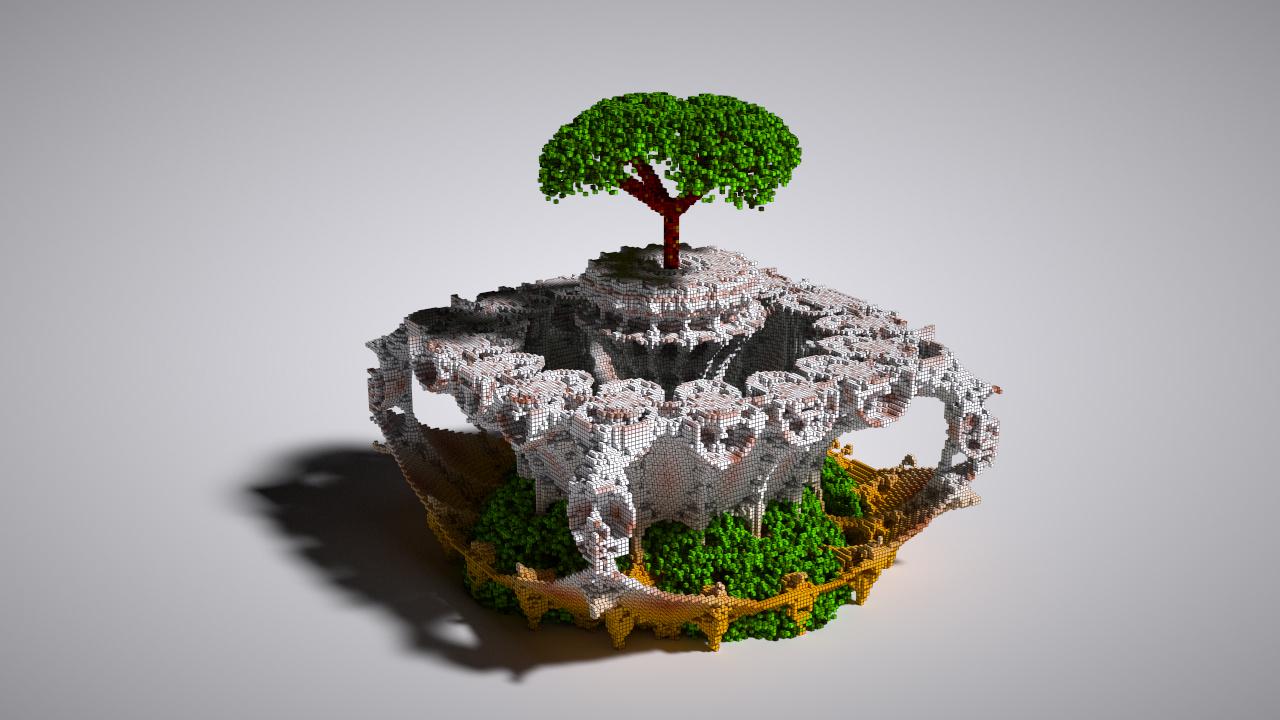
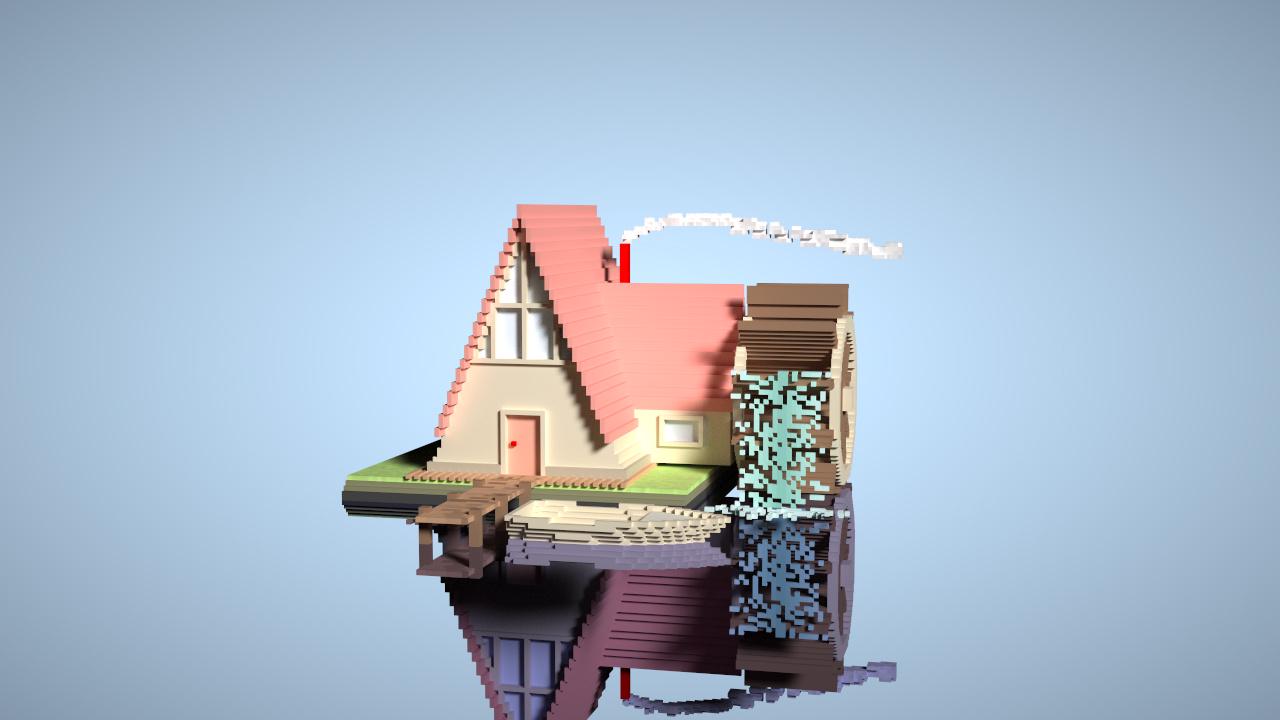
Click bit.ly/3whe1zX for more interesting voxel artworks, along with their source code!
Can't wait to join the competition?
For those voxel art lovers, so long as you can program in Python, I assure you that you will create some great voxel artworks! The deadline of Voxel Challenge 2022 is 18th May. Do come and compete for a Nintendo Switch with your ingenious voxel artworks!
- You can click bit.ly/3whe1zX to view more of the submissions of voxel Challenge 2022.
- We also came up with some artworks (all have source code) during internal test and before Voxel Challenge 2022. See bit.ly/3FGDwxr.
Note that the voxel editor required by Voxel Challenge 2022 requires the Python environment only. It supports Windows, macOS, and Linux. It works fine even if you don't have a GPU.