Ever since the Python programming language was born, its core philosophy has always been to maximize the readability and simplicity of code. In fact, the reach for readability and simplicity is so deep within Python's root, that if you type import this in a Python console, it will recite a little poem:
Beautiful is better than ugly.
Explicit is better than implicit.
Simple is better than complex.
Complex is better than complicated.
Flat is better than nested.
Sparse is better than dense.
Readability counts.
...
Simple is better than complex. Readability counts. No doubt, Python has indeed been quite successful at achieving these goals: it is by far the most friendly language to learn, and an average Python program is often 5-10 times shorter than equivalent C++ code. Unfortunately, there is a catch: Python's simplicity comes at the cost of reduced performance. In fact, it is almost never surprising for a Python program to be 10-100 times slower than its C++ counterpart. It thus appears that there is a perpetual trade-off between speed and simplicity, and no programming language shall ever possess both.
But don't you worry, all hope is not lost.
Taichi: best of both worlds
The Taichi Programming Language is an attempt to extend the Python programming language with constructs that enable general-purpose, high-performance computing. It is seamlessly embedded in Python, yet can summon every ounce of computing power in a machine -- the multi-core CPU, and more importantly, the GPU.
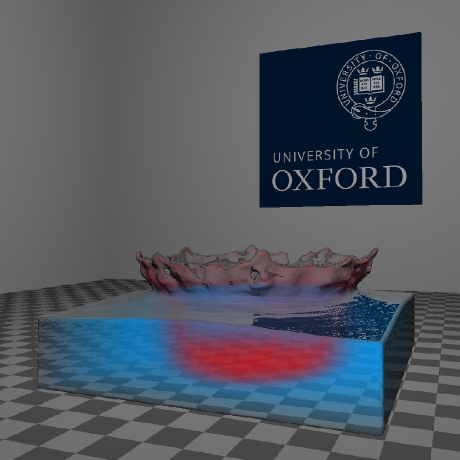
The following gif shows an example program written using taichi. The program uses the GPU to run a real-time physical simulation of a piece of cloth falling onto a sphere, and simultaneously renders the result.

Writing a real-time GPU physics simulator is rarely an easy task, but the Taichi source code behind this program is surprisingly simple. The remainder of this article will walk you through the entire implementation, so you can get a taste of the functionalities that taichi provides, and just how powerful and friendly they are.
Before we begin, take a guess of how many lines of code does this program consist of. You will find the answer at the end of the article.
Algorithmic Overview
Our program will model the piece of cloth as a mass-spring system. More specifically, we will represent the piece of cloth as an N by N grid of point-masses, where adjacent points are linked by springs. The following image, provided by Matthew Fisher, illustrates this structure:

The motion of this mass-spring system is affected by 4 factors:
- Gravity
- Internal forces of the springs
- Damping
- Collision with the red ball in the middle
For the simplicity of this blog, we ignore the self-collisions of the cloth. Our program begins at time t = 0. Then, at each step of the simulation, it advances time by a small constant dt. The program estimates what happens to the system in this small period of time by evaluating the effect of each of the 4 factors above, and updates the position and velocity of each mass point at the end of the timestep. The updated positions of mass points are then used to update the image rendered on the screen.
Getting Started
Although Taichi is a programming language in its own right, it exists in the form of a Python package, and can be installed by simply running
pip install taichi
To start using Taichi in a python program, import it under the alias ti:
import taichi as ti
The performance of a Taichi program is maximized if your machine has a CUDA-enabled Nvidia GPU. If this is the case, add the following line of code after the import:
ti.init(arch=ti.cuda)
If you don't have a CUDA GPU, Taichi can still interact with your GPU via other graphics APIs, such as ti.metal, ti.vulkan, and ti.opengl. However, Taichi's support for these APIs are not as complete as its CUDA support, so for now, use the CPU backend:
ti.init(arch=ti.cpu)
And don't worry, Taichi is blazing fast even if it only runs on the CPU.
Having initialized Taichi, we can start declaring the data structures used to describe the mass-spring cloth. We add the following lines of code:
N = 128
x = ti.Vector.field(3, float, (N, N))
v = ti.Vector.field(3, float, (N, N))
These three lines declare x and v to be 2D arrays of size N by N, where each element of the array is a 3-dimensional vector of floating-point numbers. In Taichi, arrays are referred to as "field"s, and these two fields respectively record the position and velocity of the point masses. Notice that, if you initialized Taichi to run on a CUDA GPU, these fields/arrays will be automatically stored in GPU memory.
Apart from the cloth, we also need to define the ball in the middle:
ball_radius = 0.2
ball_center = ti.Vector.field(3, float, (1,))
Here, ball center is a 1D field of size 1, with its single component being a 3-dimensional floating point vector.
Having declared the fields needed, let's initialize these fields with the corresponding data at t = 0. We wish to ensure that for any pair of adjacent points on the same row or column, the distance between them is equal to cell_size = 1.0 / N. This is ensured by the following initialization routine:
def init_scene():
    for i, j in ti.ndrange(N, N):
        x[i, j] = ti.Vector([i * cell_size,
                             j * cell_size / ti.sqrt(2),
                             (N - j) * cell_size / ti.sqrt(2)])
    ball_center[0] = ti.Vector([0.5, -0.5, 0.0])
No need to worry about the meaning behind the value each x[i,j] -- it is only chosen so that the cloth falls down at the 45 degrees angle as shown in the gif.
Simulation
At each timestep, our program simulates 4 things that affect the motion of the cloth: gravity, internal forces of springs, damping, and collision with the red ball.
Gravity is the most straightforward to handle. Here's the code that does it:
@ti.kernel
def step():
    for i in ti.grouped(v):
        v[i].y -= gravity * dt
There're two things to be noted here: firstly, for i in ti.grouped(x) means that the loop will iterate over all elements of x, regardless of how many dimensions there are in x. Secondly and most importantly, the annotation ti.kernel means that taichi will automatically parallelize any top-level for-loops inside the function. In this case, taichi will update the y component of each of the N*N vectors in v in parallel.
Next up, we will handle the internal forces of the strings. Firstly, notice from the previous illustration that each mass point is connected to at most 8 neighbors. These links are represented in our program as follows:
links = [[-1, 0], [1, 0], [0, -1], [0, 1], [-1, -1], [1, -1], [-1, 1], [1, 1]]
links = [ti.Vector(v) for v in links]
From a physical perspective, each spring s in the system is initialized with a rest length, l(s,0). At any time t, if the current length l(s,t) of s exceeds l(s,0), then the spring will exert a force on its endpoints that pulls them together. Conversely, if l(s,t) is smaller than l(s,0), then the spring will push the endpoints away from each other. The magnitude of these forces are always proportional to the absolute value of l(s,0)-l(s,0). This interaction is captured by the following code snippet:
    for i in ti.grouped(x):
        force = ti.Vector([0.0,0.0,0.0])
        for d in ti.static(links):
            j = min(max(i + d, 0), [N-1,N-1])
            relative_pos = x[j] - x[i]
            current_length = relative_pos.norm()
            original_length = cell_size * float(i-j).norm()
            if original_length != 0:
                force +=  stiffness * relative_pos.normalized() *
                    (current_length - original_length) /
                    original_length
        v[i] +=  force * dt
Notice that this for loop should still be placed as a top-level for loop in the substep function, which was annotated with @ti.kernel. This ensures that the spring forces applied to each mass point are computed in parallel. The variable stiffness is a constant which controls the extent to which the springs resist change in their length. In our program, we will use stiffness = 1600.
In the real world, when springs oscillate, the energy stored in the springs dissipates into the surrounding environment, and its oscillations eventually stop. To capture this effect, at each timestep, we slightly reduce the magnitude of the velocity of each point:
    for i in ti.grouped(x):
        v[i] *= ti.exp(-damping * dt)
where damping takes the fixed value of 2.
We also need to handle the collision between the cloth and the red ball. To do this, we simply decrease the velocity of a mass point to 0 as soon as it comes into contact with the ball. This ensures that the cloth "hang"s on the ball instead of penetrating it or sliding down:
        if (x[i]-ball_center[0]).norm() <= ball_radius:
            v[i] = ti.Vector([0.0, 0.0, 0.0])
And finally, we update the position of each mass point using its velocity:
x[i] += dt * v[i]
And that's it! This is all the code that we need to perform a parallel simulation of a mass-spring-cloth.
Rendering
We will use taichi's built-in GPU-based GUI system (nicknamed "GGUI") to render the cloth. GGUI uses the Vulkan graphics API for rendering, so make sure you have Vulkan installed on your machine. GGUI supports rendering two types of 3D objects: triangle meshes, and particles. We will render the cloth as a triangle mesh, and render the red ball as a single particle.
GGUI represents a triangle mesh with two taichi fields: a field of vertices, and a field of indices. The vertices fields is a 1-dimensional field where each element extract is a 3D vector that represents the position of a vertex, possibly shared by multiple triangles. In our application, every point mass is a triangle vertex, so we can simply copy data from x into vertices:
vertices = ti.Vector.field(3, float, N * N)

@ti.kernel
def set_vertices():
    for i, j in ti.ndrange(N, N):
        vertices[i * N + j] = x[i, j]
Notice that, set_vertices needs to be called every frame, because the vertex positions are constantly being updated by the simulation.
Our cloth is represented by an N by N grid of mass points, which can also be seen as an N-1 by N-1 grid of small squares. Each of these squares will be rendered as two triangles. Thus, there are a total of (N - 1) * (N - 1) * 2 triangles. Each of these triangles will be represented as 3 integers in the vertices field, which records the indices of the vertices of the triangle in the vertices field. The following code snippet captures this structure:
num_triangles = (N - 1) * (N - 1) * 2
indices = ti.field(int, num_triangles * 3)

@ti.kernel
def set_indices():
    for i, j in ti.ndrange(N, N):
        if i < N - 1 and j < N - 1:
            square_id = (i * (N - 1)) + j
            # 1st triangle of the square
            indices[square_id * 6 + 0] = i * N + j
            indices[square_id * 6 + 1] = (i + 1) * N + j
            indices[square_id * 6 + 2] = i * N + (j + 1)
            # 2nd triangle of the square
            indices[square_id * 6 + 3] = (i + 1) * N + j + 1
            indices[square_id * 6 + 4] = i * N + (j + 1)
            indices[square_id * 6 + 5] = (i + 1) * N + j
Notice that, unlike set_vertices, the function set_indices only needs to be called once. This is because the indices of the triangle vertices don't actually change -- it's only the positions that are changing.
For rendering the red ball as a particle, we don't actually need to prepare any data, the ball_center and ball_radius variable that we previously defined are all that's needed by GGUI.
Putting everything together
At this point, we have covered all the core functions of the program! Here's how we will call these functions
init()
set_indices()

window = ti.ui.Window("Cloth", (800, 800), vsync=True)
canvas = window.get_canvas()
scene = ti.ui.Scene()
camera = ti.ui.make_camera()

while window.running:
    for i in range(30):
        step()
    set_vertices()

    camera.position(0.5, -0.5, 2)
    camera.lookat(0.5, -0.5, 0)
    scene.set_camera(camera)

    scene.point_light(pos=(0.5, 1, 2), color=(1, 1, 1))
    scene.mesh(vertices, indices=indices, color=(0.5, 0.5, 0.5), two_sided = True)
    scene.particles(ball_center, radius=ball_radius, color=(0.5, 0, 0))
    canvas.scene(scene)
    window.show()
One small thing to note is that instead of calling step() once, we will call it 30 times for each frame in the main program loops. The purpose of this is just so the animation doesn't run too slowly.
Putting everything together, the entire program should look something like this:
import taichi as ti
ti.init(arch=ti.cuda) # Alternatively, ti.init(arch=ti.cpu)

N = 128
cell_size = 1.0 / N
gravity = 0.5
stiffness = 1600
damping = 2
dt = 5e-4

ball_radius = 0.2
ball_center = ti.Vector.field(3, float, (1,))

x = ti.Vector.field(3, float, (N, N))
v = ti.Vector.field(3, float, (N, N))

num_triangles = (N - 1) * (N - 1) * 2
indices = ti.field(int, num_triangles * 3)
vertices = ti.Vector.field(3, float, N * N)

def init_scene():
    for i, j in ti.ndrange(N, N):
        x[i, j] = ti.Vector([i * cell_size ,
                             j * cell_size / ti.sqrt(2),
                             (N - j) * cell_size / ti.sqrt(2)])
    ball_center[0] = ti.Vector([0.5, -0.5, -0.0])

@ti.kernel
def set_indices():
    for i, j in ti.ndrange(N, N):
        if i < N - 1 and j < N - 1:
            square_id = (i * (N - 1)) + j
            # 1st triangle of the square
            indices[square_id * 6 + 0] = i * N + j
            indices[square_id * 6 + 1] = (i + 1) * N + j
            indices[square_id * 6 + 2] = i * N + (j + 1)
            # 2nd triangle of the square
            indices[square_id * 6 + 3] = (i + 1) * N + j + 1
            indices[square_id * 6 + 4] = i * N + (j + 1)
            indices[square_id * 6 + 5] = (i + 1) * N + j

links = [[-1, 0], [1, 0], [0, -1], [0, 1], [-1, -1], [1, -1], [-1, 1], [1, 1]]
links = [ti.Vector(v) for v in links]

@ti.kernel
def step():
    for i in ti.grouped(x):
        v[i].y -= gravity * dt
    for i in ti.grouped(x):
        force = ti.Vector([0.0,0.0,0.0])
        for d in ti.static(links):
            j = min(max(i + d, 0), [N-1,N-1])
            relative_pos = x[j] - x[i]
            current_length = relative_pos.norm()
            original_length = cell_size * float(i-j).norm()
            if original_length != 0:
                force +=  stiffness * relative_pos.normalized() * (current_length - original_length) / original_length
        v[i] +=  force * dt
    for i in ti.grouped(x):
        v[i] *= ti.exp(-damping * dt)
        if (x[i]-ball_center[0]).norm() <= ball_radius:
            v[i] = ti.Vector([0.0, 0.0, 0.0])
        x[i] += dt * v[i]

@ti.kernel
def set_vertices():
    for i, j in ti.ndrange(N, N):
        vertices[i * N + j] = x[i, j]

init_scene()
set_indices()

window = ti.ui.Window("Cloth", (800, 800), vsync=True)
canvas = window.get_canvas()
scene = ti.ui.Scene()
camera = ti.ui.make_camera()

while window.running:
    for i in range(30):
        step()
    set_vertices()

    camera.position(0.5, -0.5, 2)
    camera.lookat(0.5, -0.5, 0)
    scene.set_camera(camera)

    scene.point_light(pos=(0.5, 1, 2), color=(1, 1, 1))
    scene.mesh(vertices, indices=indices, color=(0.5, 0.5, 0.5), two_sided = True)
    scene.particles(ball_center, radius=ball_radius, color=(0.5, 0, 0))
    canvas.scene(scene)
    window.show()
Total number of lines: 91.
Fun things to do
I hope you enjoyed this program! If you did, I have a few challenges for you:
[Easy] Mess around with the parameters: see how varying the
stiffness,damping, anddtchanges the behavior of this program.[Easy] Search the program text for
vsync=True, and change it tovsync=False. This will remove the 60 FPS limit on the program. Observe how fast the program can run on your machine.[Medium] Implement a slightly more complicated interaction between the cloth and the ball: make it slide down the ball without penetrating it.
- [Medium] Add more balls: make the cloth interact with more than one ball.
As an example of what the last two challenges may look like:

And finally,
- [Hard] Having completed the 2nd challenge, try to implement the same program in another programming language, or in Python but without Taichi. See what's the maximum FPS that you can obtain, and what's the amount of code that you need to write in order to obtain that performance.
Parting Words
Let's review what Taichi enabled us to accomplish in 91 lines of Python:
- Simulate a mass-spring system with over ten thousand mass points and around a hundred thousand springs.
- Using the
@ti.kernelannotation, automatically parallelize the simulation via a CUDA GPU or multi-threading on CPU - Render the result in real-time via a GPU renderer.
Not only did Taichi allow us to implement all these complex functionalities with a small amount of code, it saved us the effort of having to learn CUDA, or multi-thread programming, or GPU rendering. With Taichi, anyone can write high-performance programs, and they can focus on the algorithmic aspects of their code, while leaving the performance aspects to the programming language itself. This brings us to the motto upon which Taichi is built: Parallel Programming for Everyone.
To learn more about Taichi, please do visit its Github Page, where you can find detailed documentation, as well as quite a few example Taichi programs, all of which are quite amusing. And finally, if you believe in our mission of making a friendly yet powerful language for parallel computation, we would be delighted to see you join us as an open-source contributor.
In our next article, we will discuss the inner workings of Taichi, and how it interacts with GPUs on different platforms for computation and rendering. Until then, happy coding!